
Getting started with AM Bench in SciServer
Welcome to SciServer!
In this tutorial you will learn how to access data from the National Institute of Standards and Technology (NIST)’s Additive Manufacturing Benchmark Test Series (AM Bench) – and how to analyze, visualize, and publish research using those datasets – using the powerful SciServer science platform.
AM Bench is a NIST-led organization that provides a continuing series of AM benchmark measurements, challenge problems, and conferences with the primary goal of enabling modelers to test their simulations against rigorous, highly controlled additive manufacturing benchmark measurement data. For more information about what the datasets contain, see SciServer’s AM Bench Datasets page, or the full data documentation on the NIST website.
AM Bench public data, code, and scripts are published in SciServer within the AM Bench Data Volume which you will be accessing in the following tutorial. The AM Bench codes and scripts are mirrored in a GitHub repo.
Should you need additional help or further information during or after the tutorial, see How to Use SciServer is in our Help pages.
Why SciServer?
Some of the AM Bench datasets are very large (1 Terabyte or more) with thousands of files, and nearly all require additional processing to extract meaningful results that can be compared with model output. To help you make the best use these benchmark datasets quickly and easily, the AM Bench project has partnered with the Institute for Data-Intensive Science at Johns Hopkins University to provide server-side processing through SciServer Compute.
AM Bench users can create a SciServer.org login to use virtual machines that include Jupyter notebooks and pre-installed software packages for AM Bench data analysis.
The instructions below will help you create a SciServer account, get access to the AM Bench datasets, and begin to visualize the data and get results.
Create and verify a SciServer account
Go to the SciServer registration page to create the credentials for your SciServer account.
Enter a username of your choosing*, email address, and password.
*Your username cannot be changed once created.
Confirm your password and agree to the SciServer Data Storage and Non-Commercial Use Policies and then click “create account.”
Check the email address you provided for a verification email and follow the link contained therein to complete your registration*. This will automatically log you into SciServer with your username.
*You MUST verify your email before you attempt to login. If you attempt to log-in before verifying you will get locked out of your account.
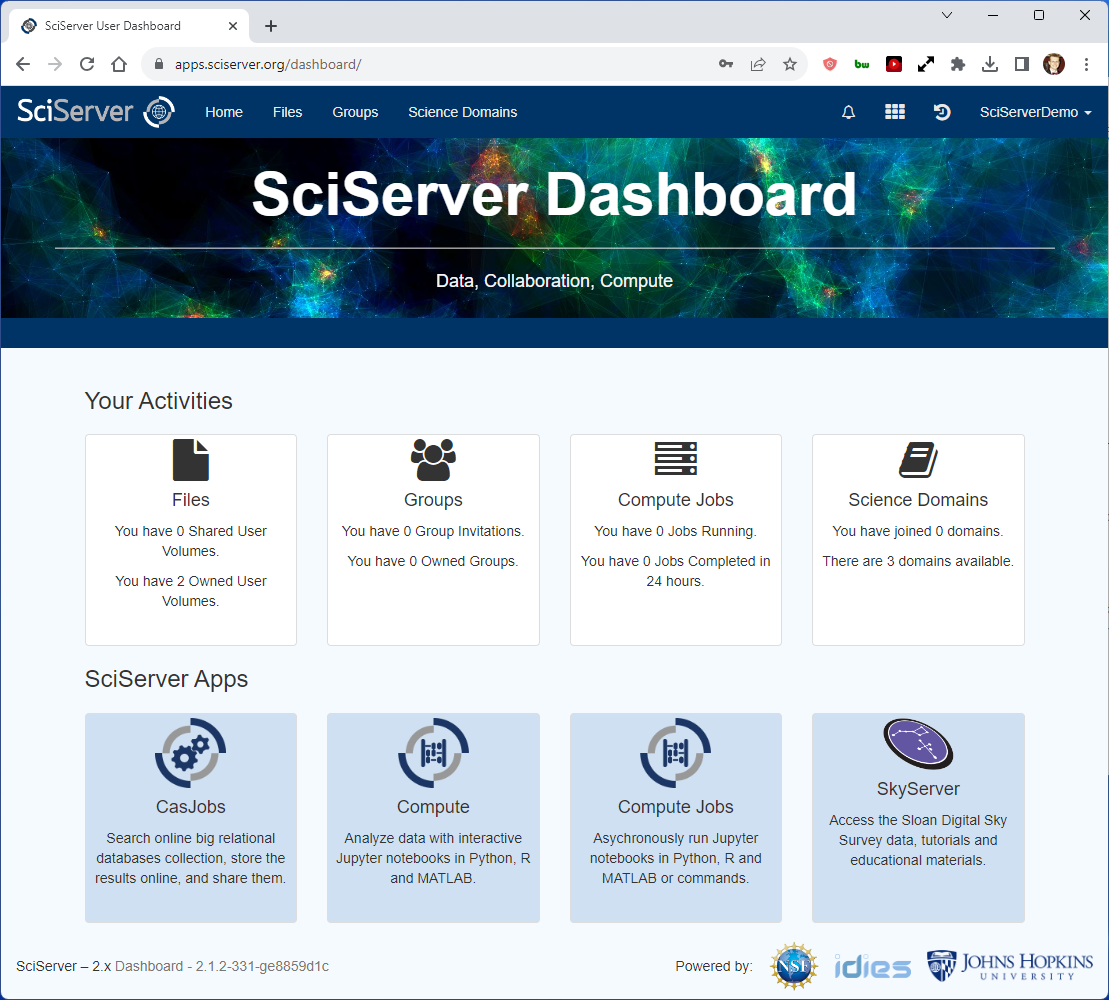
Once logged-in, you should see the SciServer Dashboard. This will be your homepage each time you log into SciServer.
By default, every SciServer user has access to user volumes called persistent and scratch. Persistent is 10 GB of storage owned exclusively by you. You have full read, write, and access granting privileges for your persistent volume, and your persistent volume is backed up. Unlike your persistent user volume, your scratch user volume is NOT backed up.*
You can access your ‘persistent’ user volume, by selecting the ‘Files’ tab.
You should always store all your scripts, and all the final results that you want to save, in your persistent volume.
*For further details on SciServer user volumes, see File Management: User Volume
Join the Manufacturing science domain
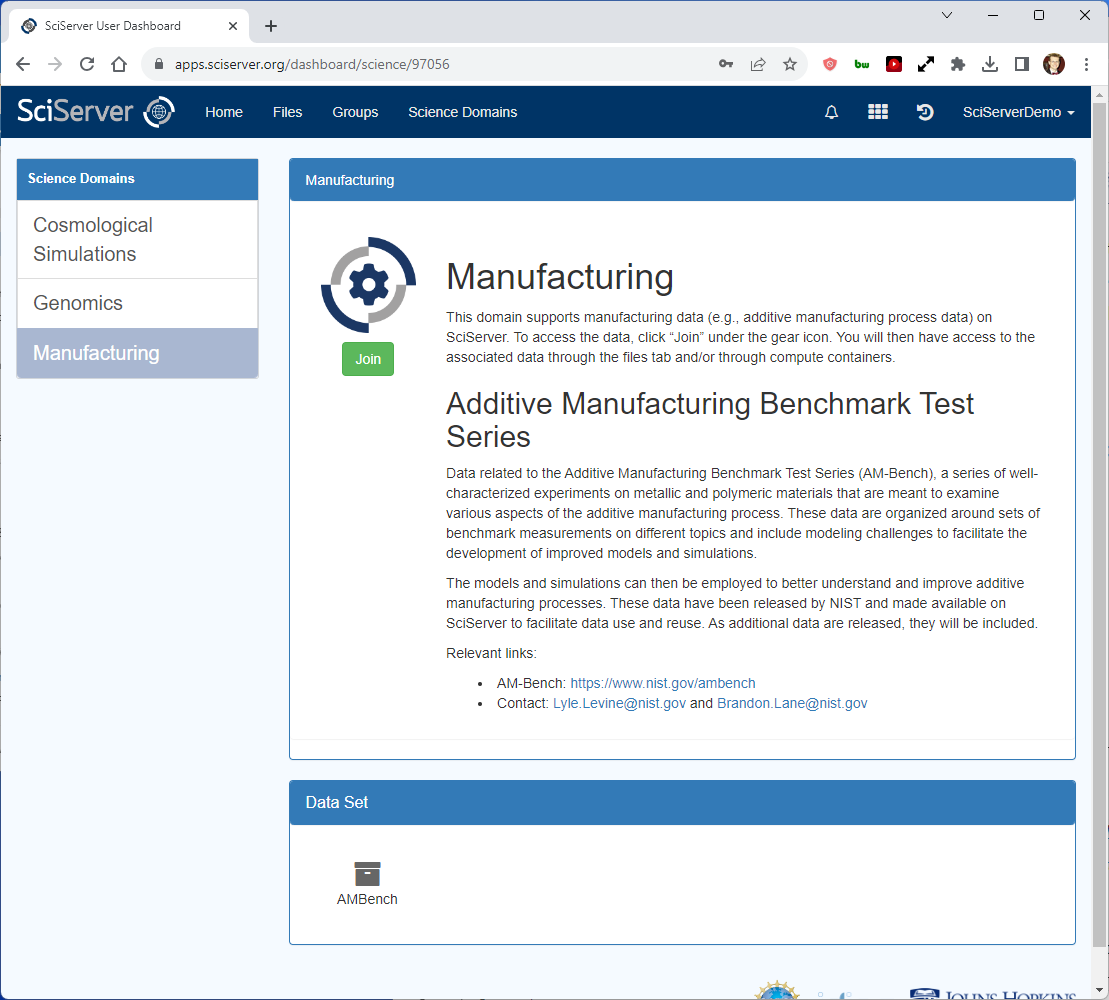
To obtain access to the AM Bench data volume, you must first join the SciServer Manufacturing domain.
From the SciServer Dashboard click “Science Domains” located in the top menu bar.
Select “Manufacturing” from the list in the left panel and click the green “Join” button in the main panel. You should now have access to a data volume which contains AM Bench data, codes, and scripts.
Browse the AM Bench datasets
Once you join the Manufacturing Science domain, a check mark will appear next to it in the list of Science Domains in the left column.
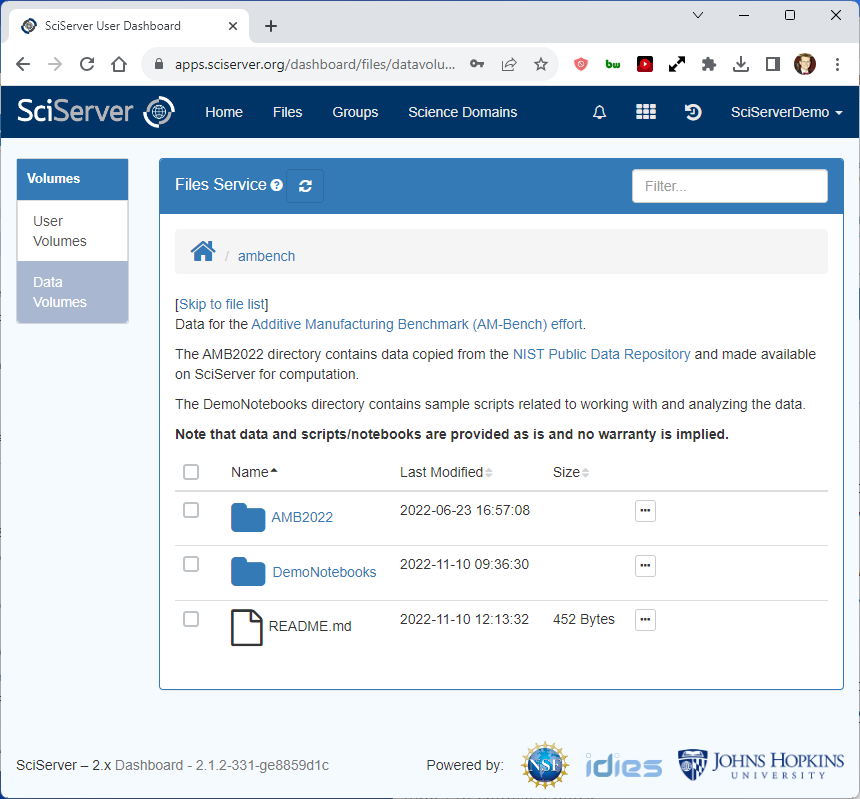
Click on Files in the top menu bar to see the list of User Volumes and Data Volumes that you have access to, and then click on Data Volumes to see the data volumes (read only).
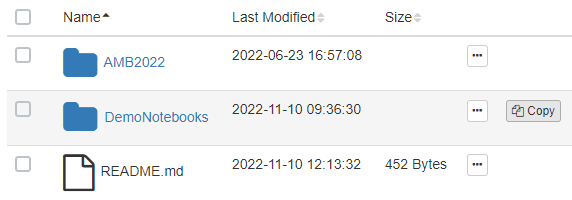
Next, click on AMBench to enter the AMBench data volume. The AMB2022 folder contains the data, and the DemoNotebooks folder contains sample scripts for working with the data. Click on the AMB2022 link to browse through the data.
When you are ready to visualize and analyze the data, move on to the next section to learn how to work with the Demo Notebooks.
Copy the AM Bench code and scripts
The AMBench data volume is read only. You can view and run example notebooks, but you cannot save your changes. Since the best way to learn is by adapting working examples, you should begin by copying the notebooks to a place where you can change them. In order to make changes to the Demo Notebooks, you must first copy them from the AM Bench data volume to your ‘persistent’ user volume.
Alternatively, you can get the code files from GitHub instead – see the Copying the AM Bench tutorial files to your persistent using Github section below.
In the top menu bar, click the ‘Files’ tab and then select ‘Data Volumes’ on the left panel. You should see ‘AMBench’ in the main panel. Click “AMBench” in order to browse it.
The second folder down titled “DemoNotebooks” is the folder you will be copying as it contains the code and scripts. The folder “AMB2022” contains the data that your code and scripts will reference and should NOT be copied.
Check the box next to the DemoNotebooks folder then at the end of that row locate the copy button which will appear upon hover (it’s to the right of the “size” column). Click the “Copy” button.
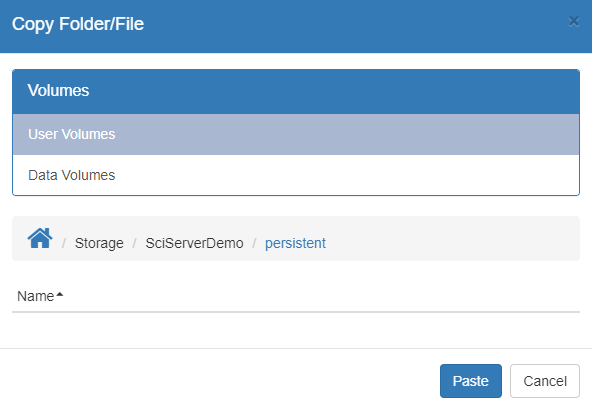
From the dialog box, select your “persistent” storage and click the paste button.*
*NOTE: You can also download the demo notebooks from NIST’s GitHub repository.
Create a SciServer Compute Container
This will serve as a workspace for you to be able to edit and run the code and scripts you just copied.
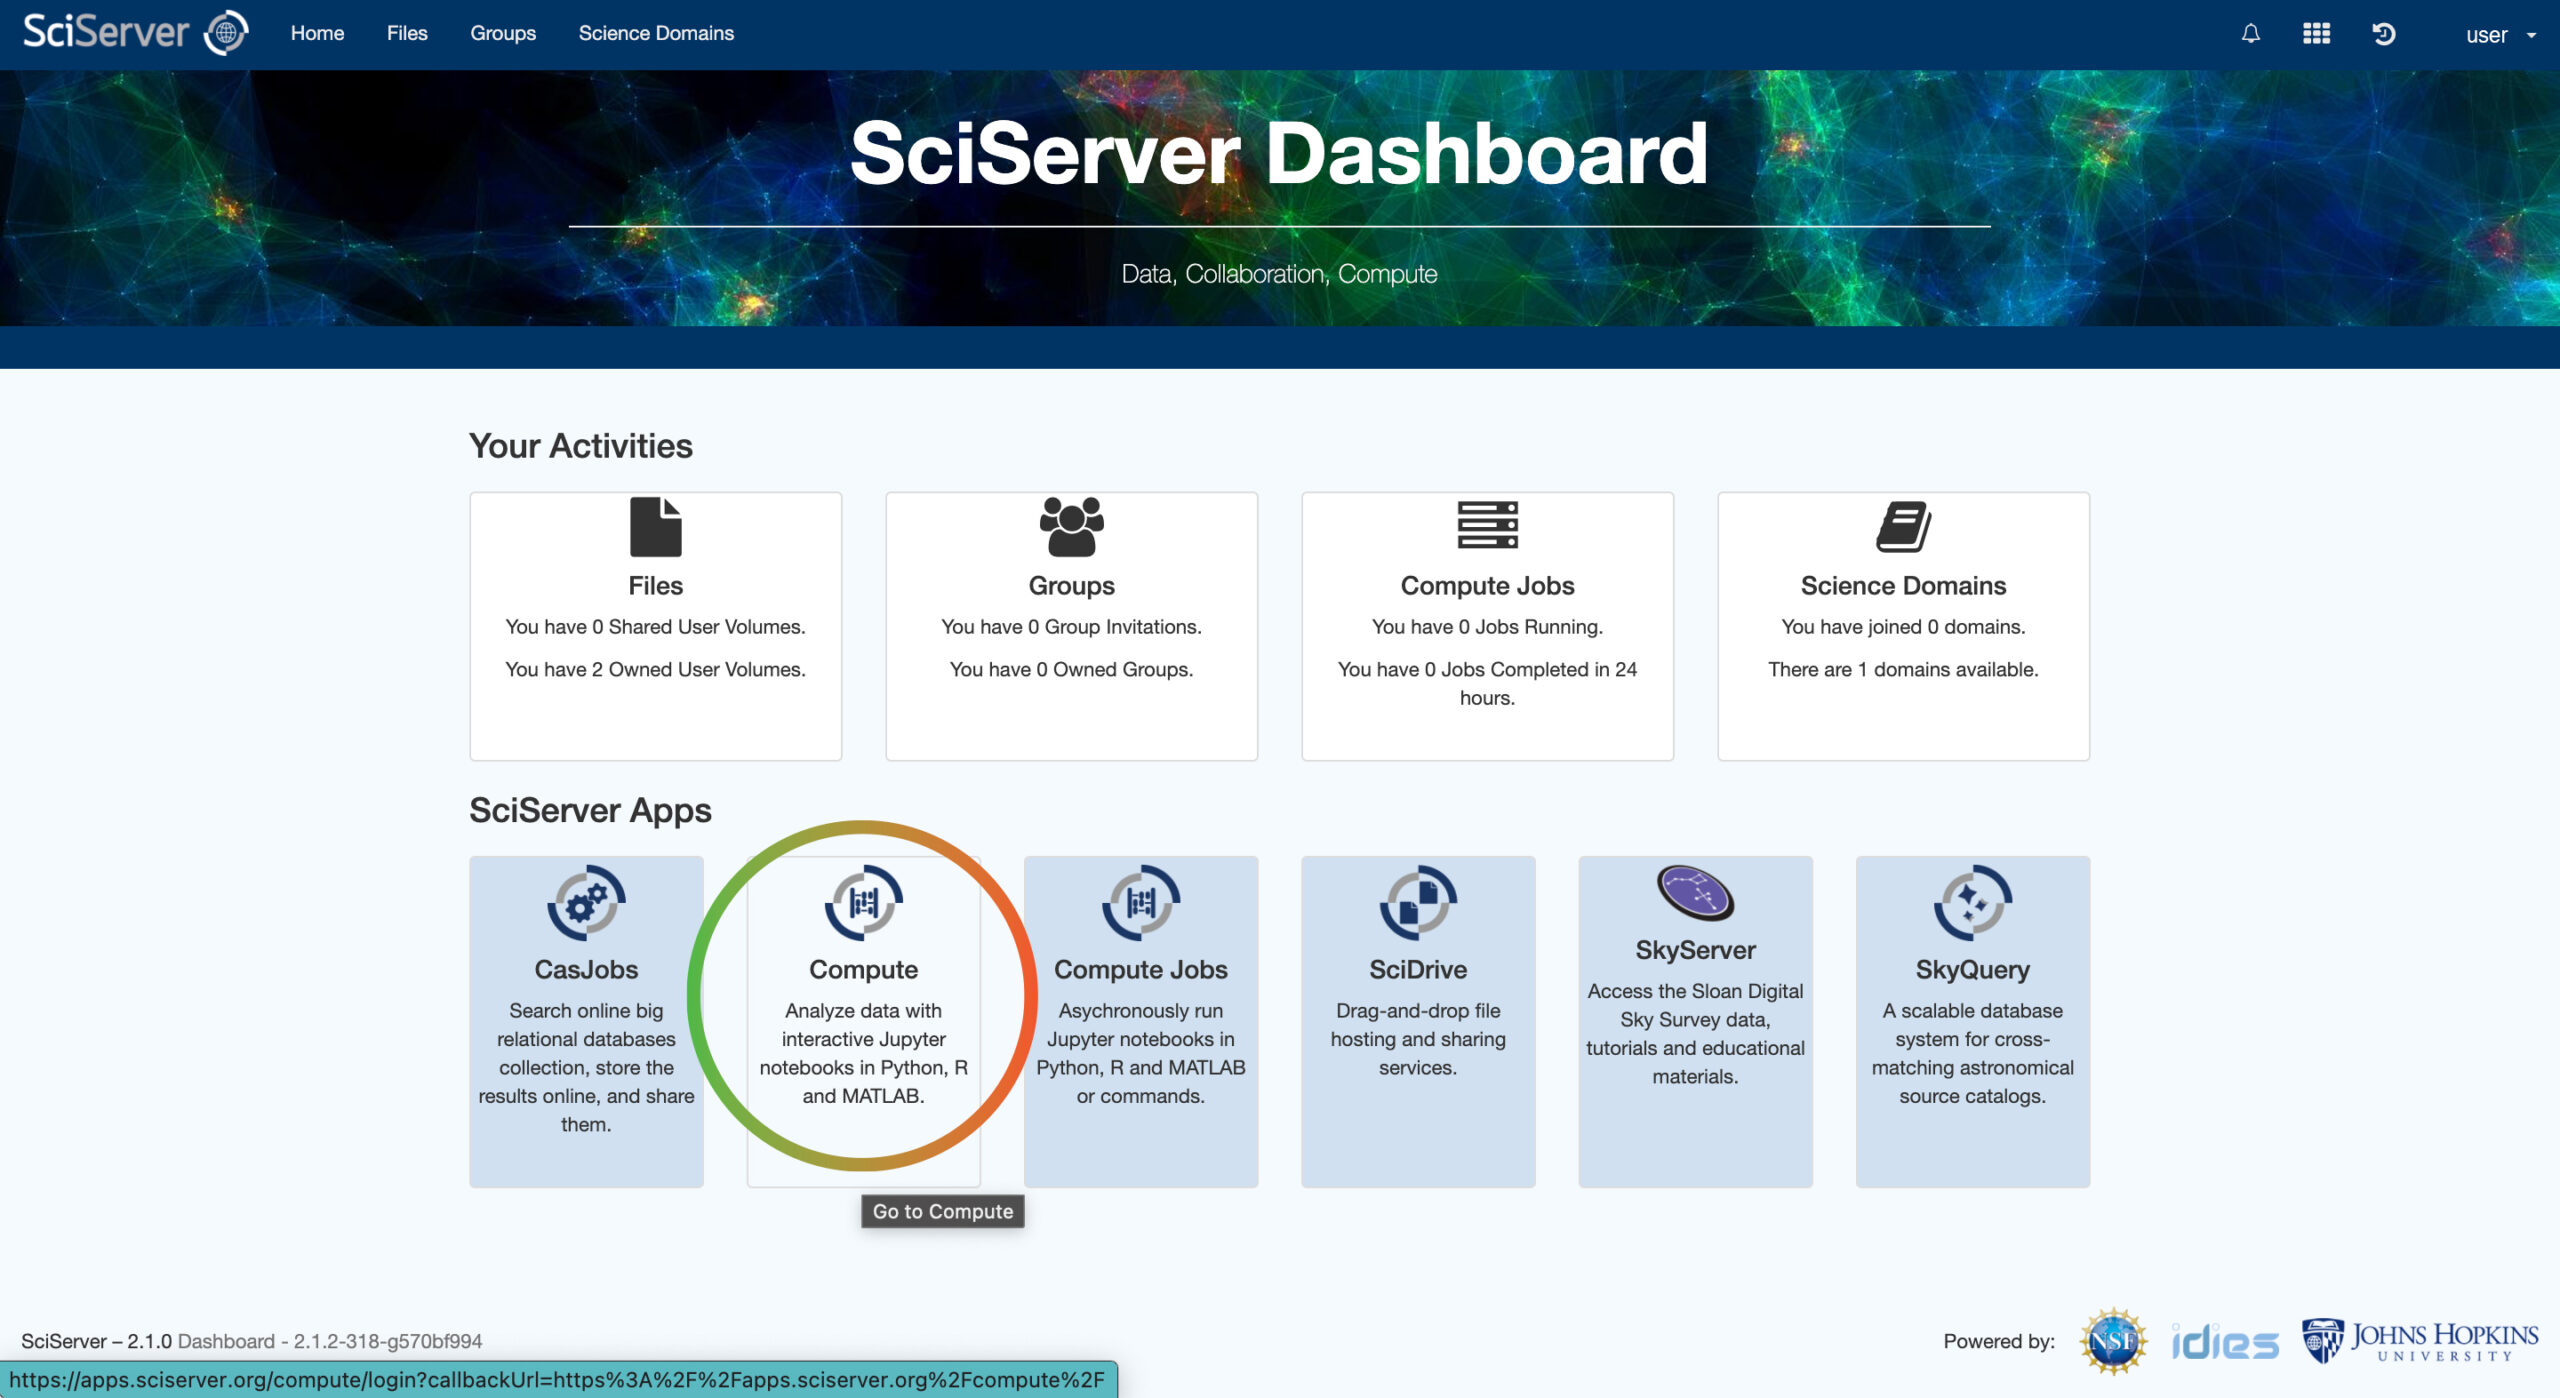
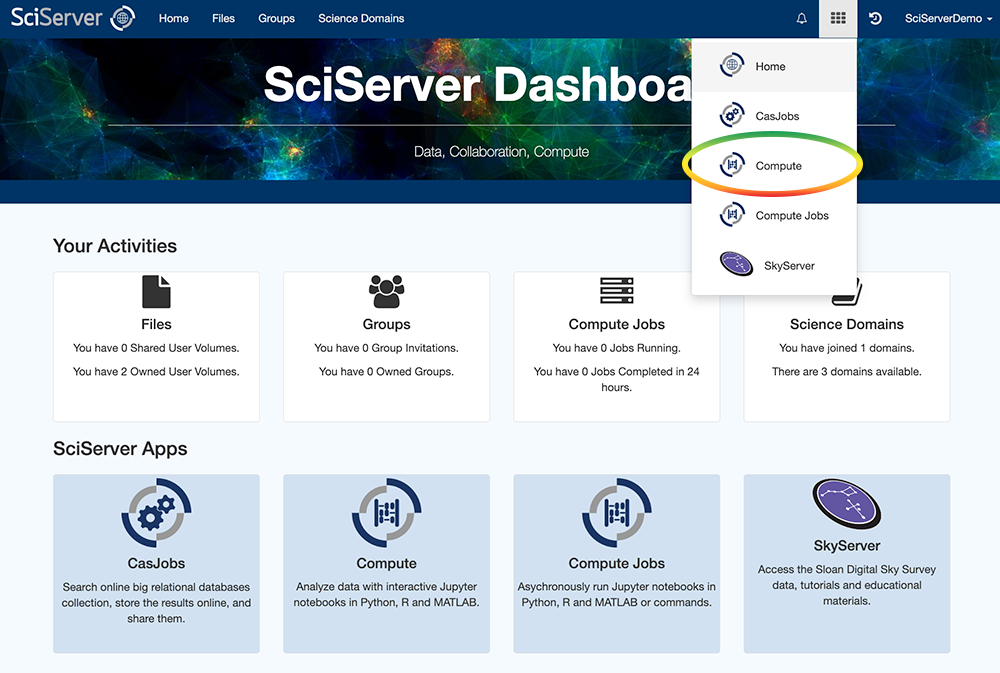
From the SciServer Dashboard, click the “Compute” button box from the list of apps or select the grid icon from the right side of the top menu bar and then click the “Compute” icon.
From the Compute Dashboard click “Create Container” and this will open a dialog box.
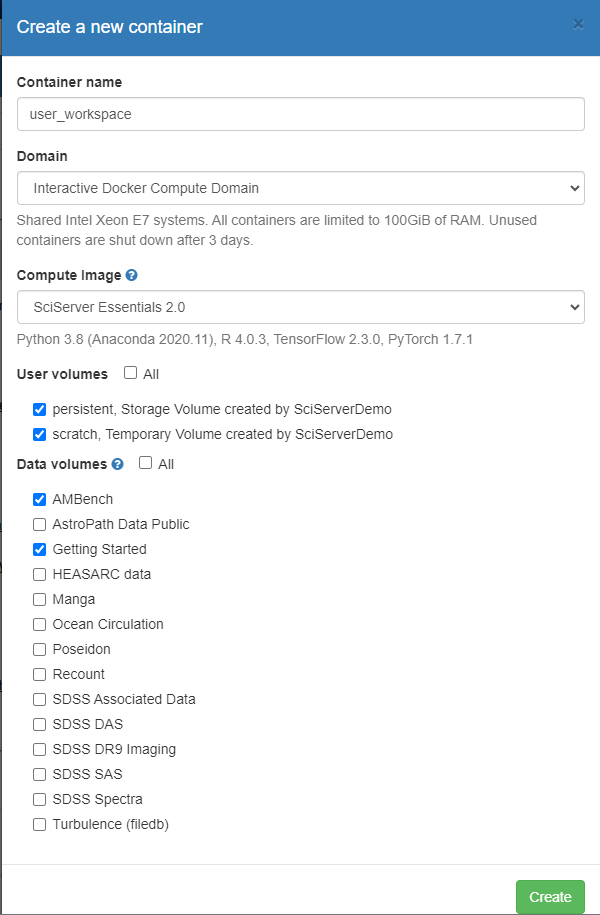
Enter the required information listed below in the dialog box (see the screenshot).
Container name: This field is up to you.
Domain: Leave at the default “Interactive Docker Compute Domain.”
Compute Image: Select “SciServer Essentials 2.0” from the dropdown list.
User Volumes: Locate and select the instances of “persistent” and “scratch” with your username next to it.
Data Volumes: select “AMBench” in order to mount the AMBench data, code, and scripts in the container. Optionally, select “Getting Started” to get other SciServer example notebooks you can copy.
Click “Create” and it will create the container, which will be listed in the Compute Dashboard.
Run the example notebooks in the container you created
From the Compute Dashboard, click on the name of the container you’ve just created to launch Jupyter.

Note: Be patient—the file may take a moment to load
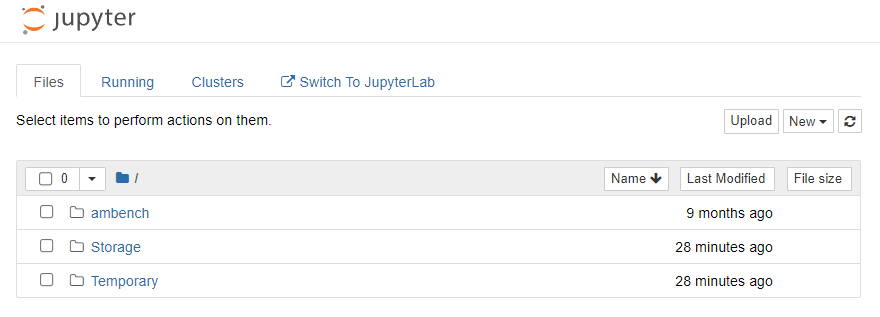
In the Jupyter file browser you should see all the volumes mounted to your container when you created it. AM Bench data volume will appear as a folder named “ambench.”
To access your SciServer persistent user volume follow the path Storage > {username} > persistent. Similarly, to access your scratch user volume follow Temporary> {username} > scratch
Go to the folder where the demo notebook is copied and open it by clicking the name of the notebook.
Read through the notebook and follow the instructions carefully. To run any code cells you encounter, simply click within the cell and then in the icon menu underneath the top Jupyter menu bar, click the “► Run” icon.
Alternate Method: Copying the AM Bench tutorial files to your persistent folder using Github
Instead of copying the AM Bench analysis code as described above, you can use GitHub to retrieve the most current version of the code. This will make it easier to keep your code up to date with any changes made by the AM Bench team.
Follow these instructions to clone the AM Bench repository from GitHub:
First, go to the URL of the AM Bench GitHub repository at https://github.com/usnistgov/ambench . Click the green ‘Code’ button and copy the HTTP URL for the repository, ‘repo-url’.
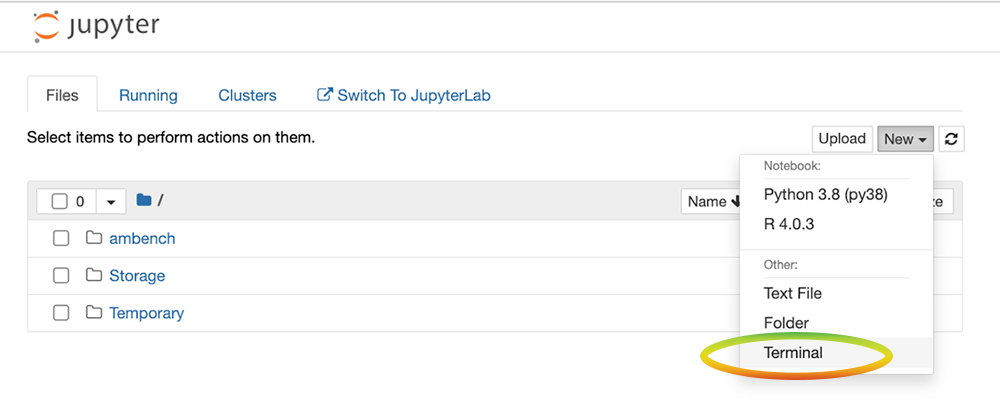
Next, return to the browser tab showing the list of Jupyter notebooks running in your SciServer Compute container, as shown in the screenshot below. Above the list of files, you will see buttons labeled “Upload” and “New,” as in the screenshot below. Click the New button to open a dropdown menu, then select Terminal.
A new browser tab will open with a Linux console within a SciServer virtual machine. This will open a Linux console. There, type the following command to go to your persistent folder, substituting {username} with your SciServer username:
cd workspace/Storage/{username}/persistent
Run the following command, substituting the URL of the repository you looked up in place of {repo-url}:
git clone '{repo-url}'
The command will create a new folder with the same name as the repository url you entered. Go into that folder to see the files.